The Long Road – and Short Distance – to my ARPS
A couple of years ago, I was successful in gaining an Associateship distinction from the Royal Photographic Society - in the Travel category.
A few people have asked me how I went through this process, this article, which also featured in the RPS Travel Group magazine, Travel Log, in September 2021, is intended to answer that question.
Ever since I first started my photographic journey many years ago, I had aspired to gaining the RPS’s Associateship distinction however, it took until about 10 years ago before I finally got round to doing something about it, making a start with my ‘L’ - the Licentiateship award. This I was able to achieve, with a panel of 10 mixed images in 2013, gaining the initials ‘LRPS’ to put after my name – I was on my way!
After digesting that for a while, I decided to go for my ‘A’ - the Associateship distinction. This requires a cohesive panel of 15 prints (or projected digital images - PDSs) with the panel layout itself effectively creating the 16th image. The key thing here is that the sit together well, are balanced and with a common theme or thread running through the panel.
My specific interest at the time was in Street photography - however the RPS’s Documentary Group did not then have an ‘A’ qualification, although it does now. So, given that ‘travel’ begins when you head out of your front door - I decided to go for this distinction as, by then, I was semi-retired and able to travel more freely.
The key message, however, that came across in all my research and preparation was that the RPS’s definition of travel photography is that the images demonstrate ‘a sense of the time and place’ - and I was going to have to achieve this with all 15 of my images.
The Place
The first thing to consider was on where I was going to base my submission. I had noted that many Associates gain their distinctions by going to exotic and far-flung places, however I felt that I needed to be able to return to my selected location easily as I prepared my panel.
I therefore chose the City of London, its Financial District, partly because I knew it well, partly because it was distinct and had its own identity but also because of both the architecture – a real mix of old & new buildings side-by-side – and a workforce that ranged from the archetypal ‘City-Gent’ through to, well a complete cross- section of society – and all within one square mile. The clinching factor was that this was easily accessible, being just an hour’s travel away.
Having been doing Street Photography for a number of years – particularly around the City, I already had quite a lot of material – however I was going to need more if I was to provide sufficient variety in my 15 images. In addition these were going to need to tone well together, provide a balanced panel and tell the story of the City. That said, given that travel photography (and therefore my panel needed to) demonstrates ‘a sense of the time and place’, it was not going to be sufficient to produce just a street photography panel - unless it was very clear where the photographs were taken.

The Format
So, having decided on the ‘where’, the next thing was to consider the ‘what’ – what format my entry submission should be - a Panel of prints or a series of PDIs. All the advice I’d received and read was that it was better to submit prints, as you’re then totally in control of what the Assessors will be assessing – there’s no risk of the colours or brightness of the images that you see on your computer screen differing from what the assessors see on their colour corrected screens. Easy decision – it was going to be a print submission.
The next question related to the size of print and mount. As regards the latter, the general recommendation is that these are 20” x 16” or 50cm x 40cm. The print itself can actually be any size – the temptation is to go for larger prints (say A3) however the strong advice that I received was to go with an A4 size – any blemishes or imperfections with your print are less likely to be seen at this size.
I was fortunate, when I started to do this, that the RPS had produced a Distinction Guide ‘Everything you need to know about gaining your Associate in Travel Photography” - (I’m not sure whether this is still available) which had some useful information as to what would be required, both in terms of print quality and panel presentation. This proved to be a good starting point.
The Statement of Intent
This is one of the most important parts of the submission – a statement of up to 150 words covering what (and where) you intend to capture and present to the panel of assessors.
I kept mine short – 75 words – and, having come up with the wording in the early part of the process, decided to both stick with it and, more importantly, keep referring back to it as I put my panel together.
“Having worked in The Square Mile (London's financial district) for many years, I wanted to try and convey, in this panel of images, what I felt, and still feel, to be the essence and character of 'The City'.
In doing this, I'm looking to show the range of people who work here, both as office workers and the people who work to support them and the environment in which they spend their working day.”
The Images
The photographs that made up my panel were taken over a series of visits to the City of London. After some initial consideration, all (with the exception of one) ended up being candid, or ‘street’ photographs of city workers going about their daily business, whatever that involved.
I was helped by the fact that the City is a great place for street photography as everyone is generally so busy rushing from one place to another, usually on their mobile phone – and, in the summer, also used to tourists wandering around taking pictures.

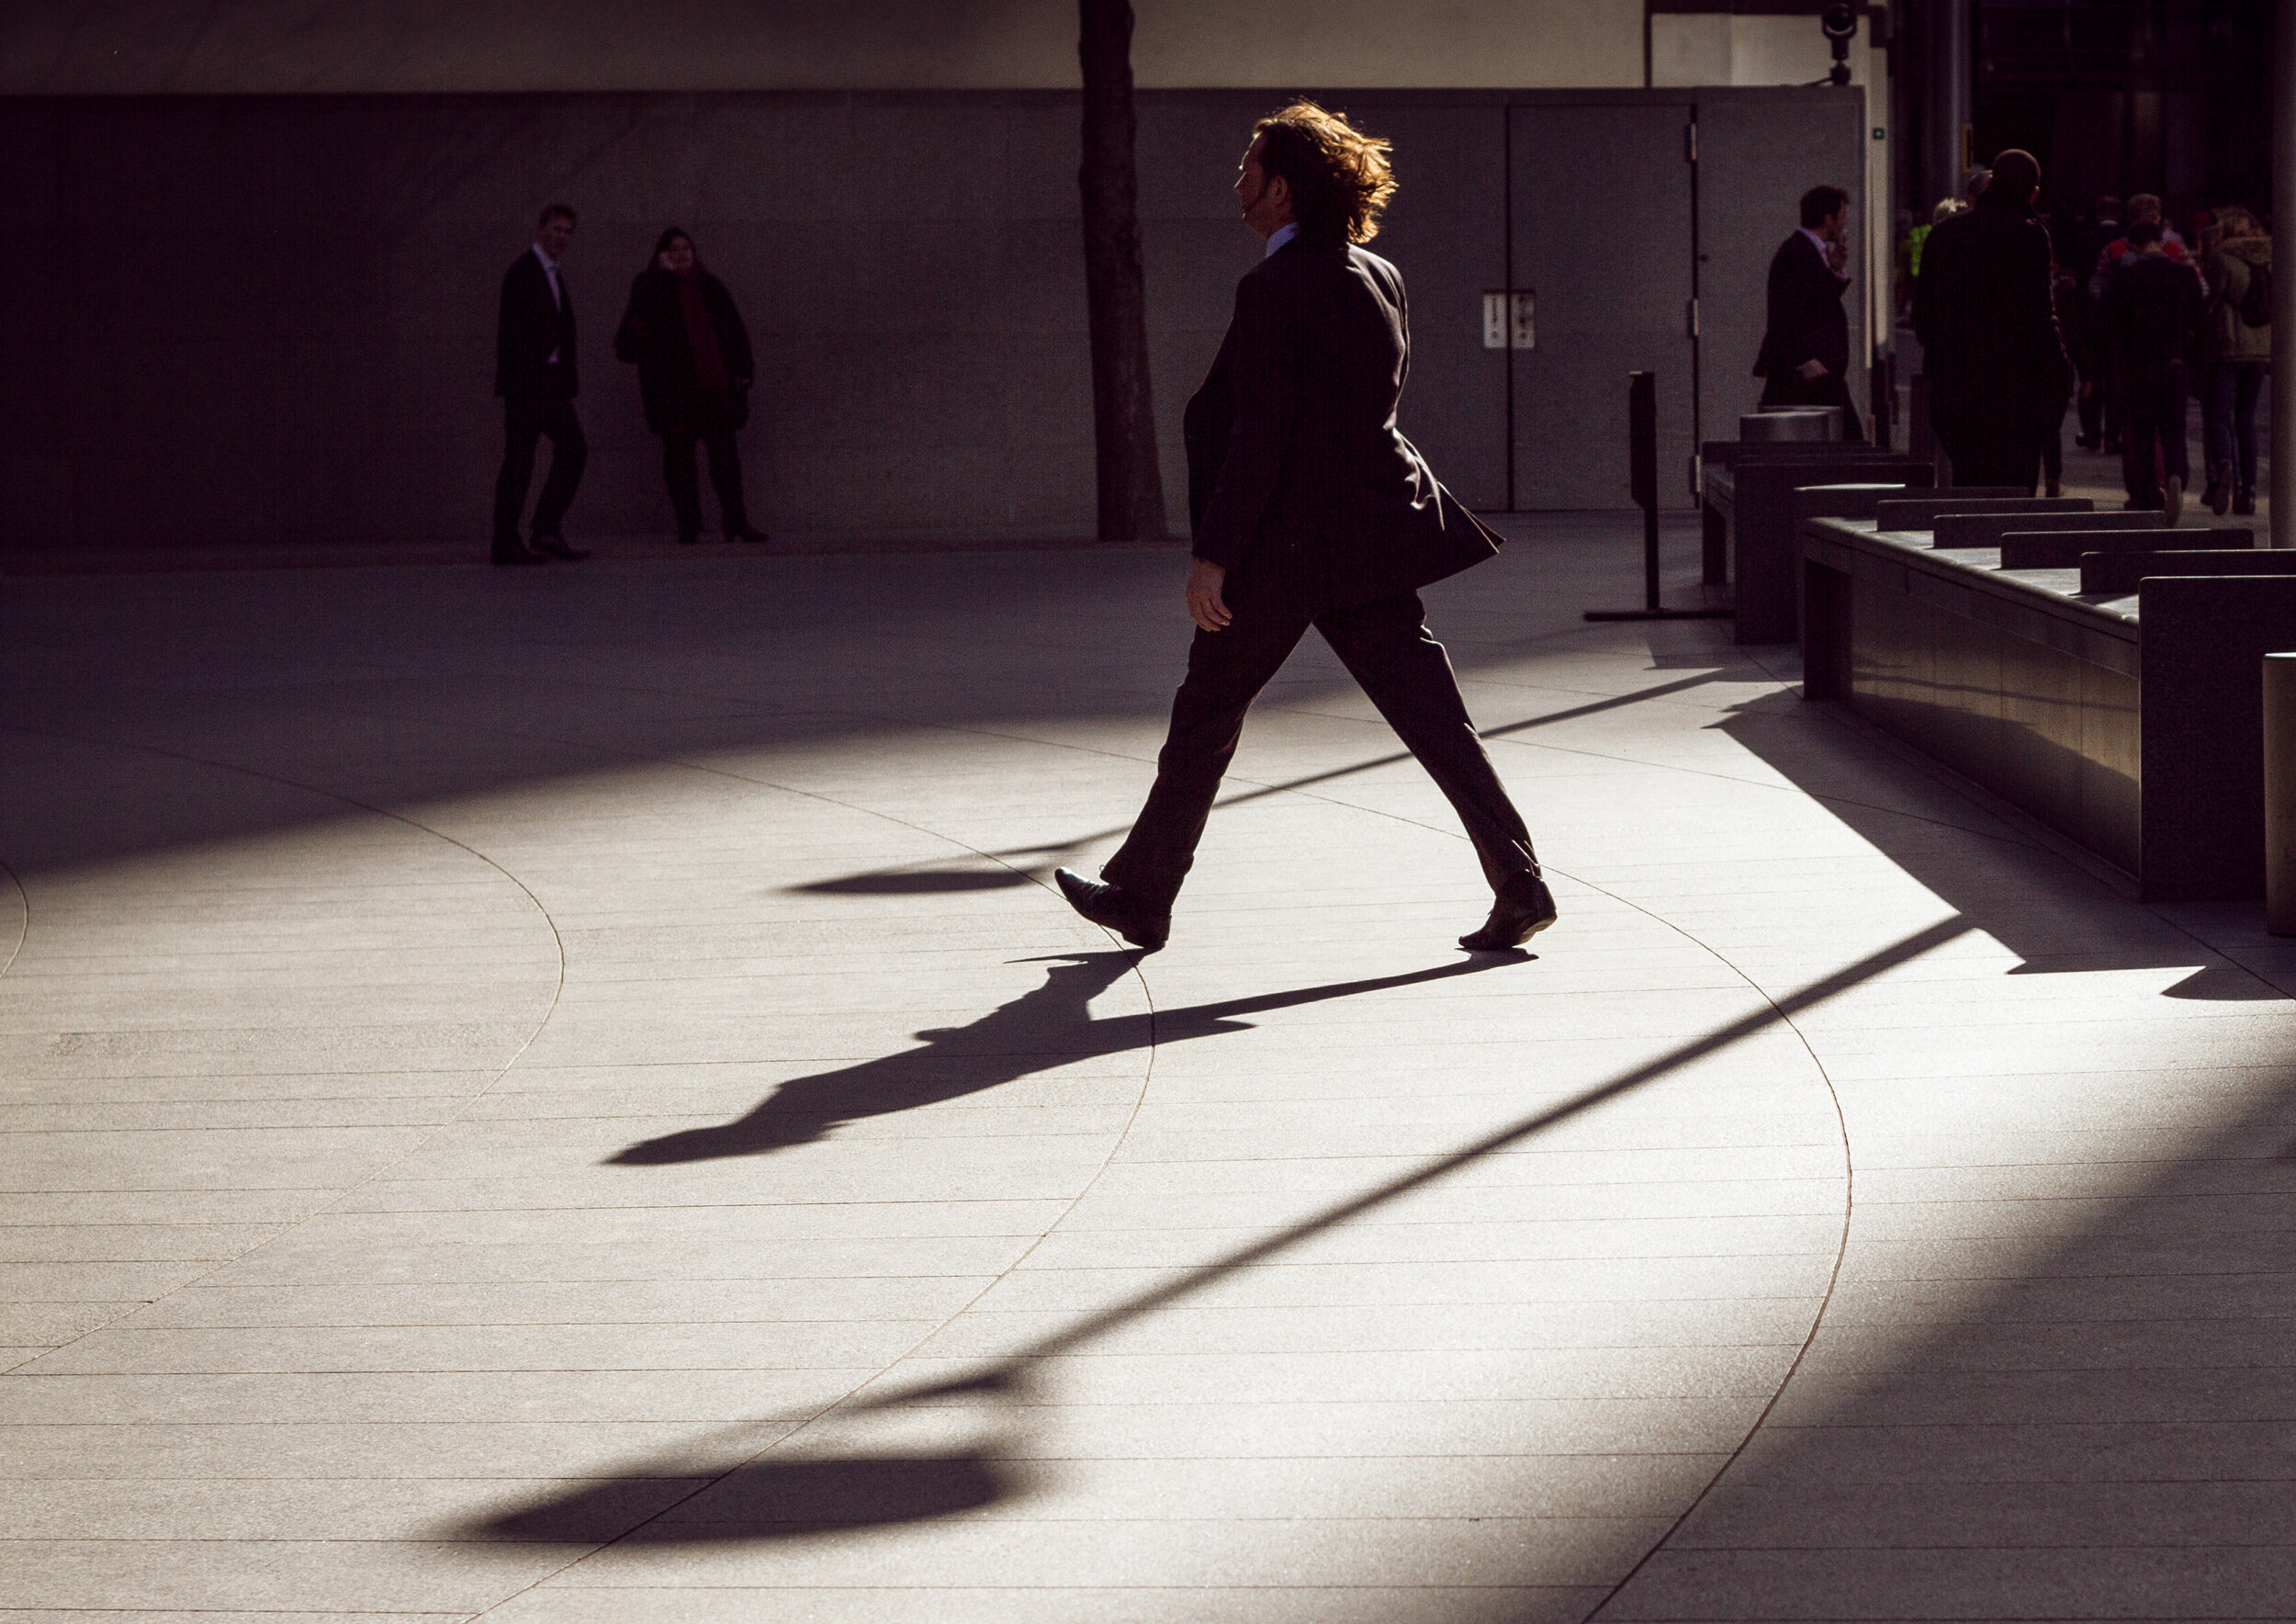


There’s also some great architecture – buildings old and new and a variety of different, but distinctive areas – and all with the space of one square mile.


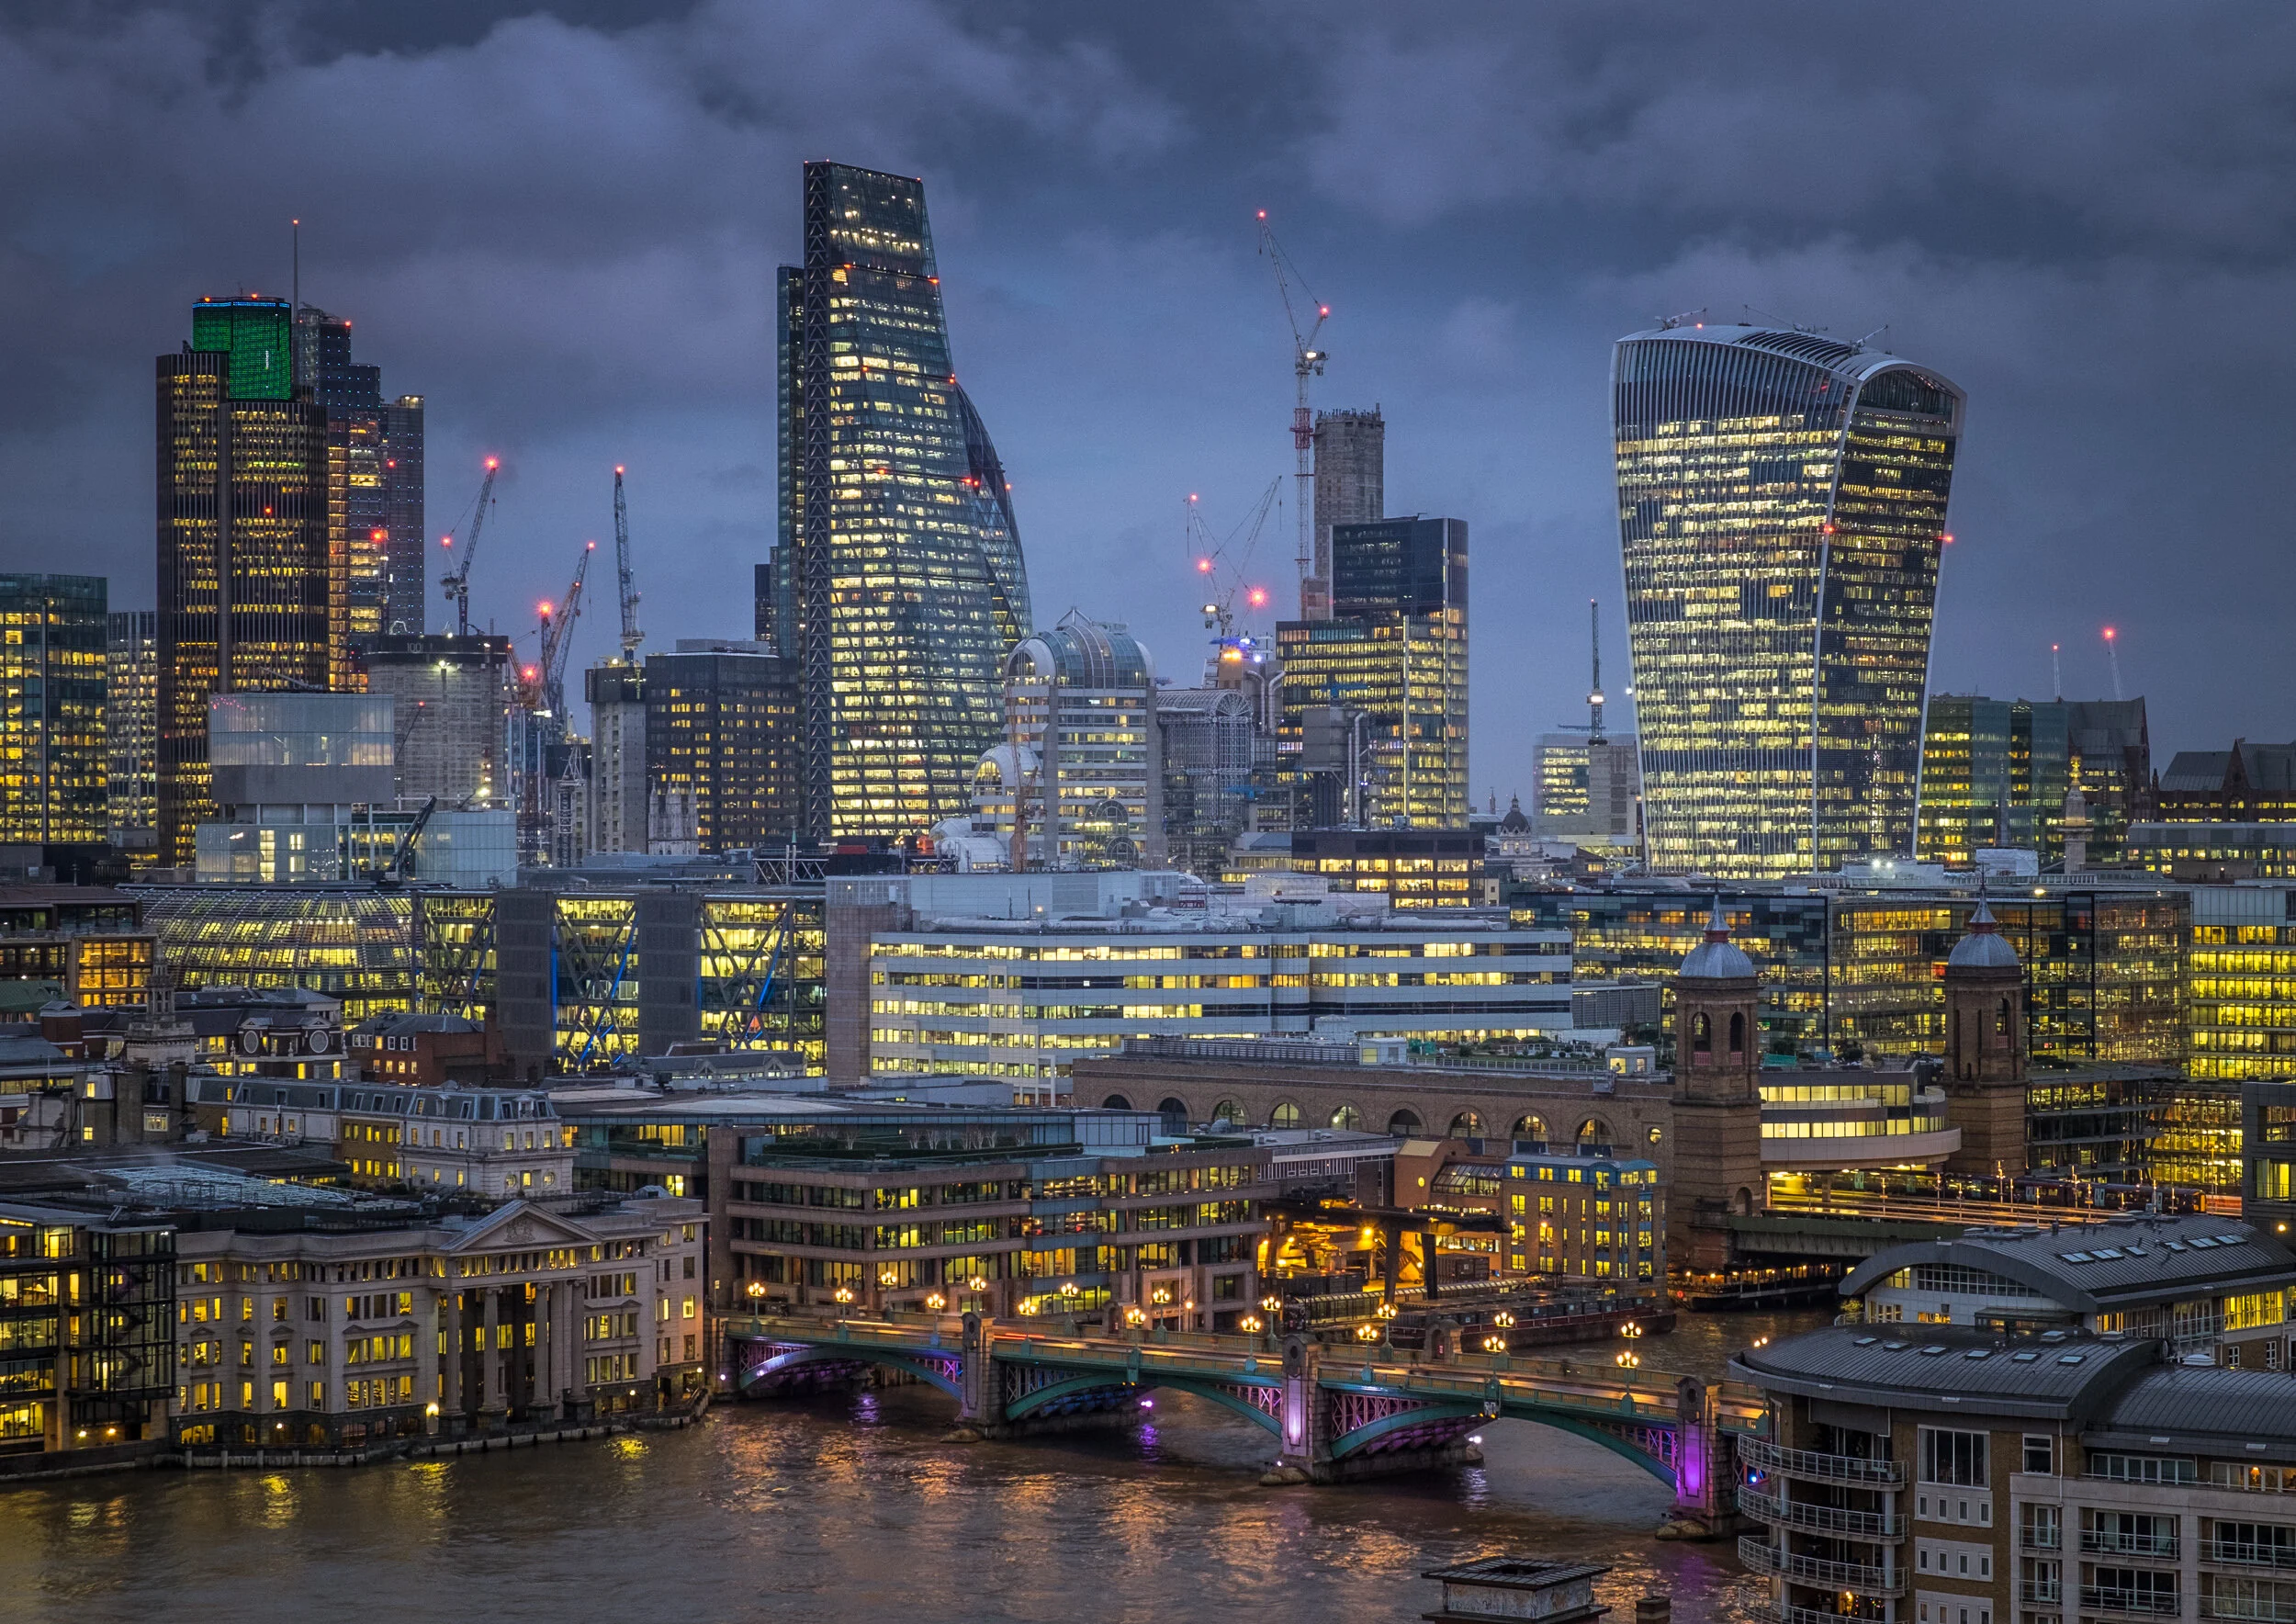
The one image that was taken away from the City was my central, placing, photograph of the City itself, which I took one evening from the viewing gallery at the Tate Modern, on the other side of the Thames. I felt that I needed this type of all-encompassing, scene-setting image to anchor my panel – and placing right in the middle was the obvious place for it.
The Panel
The next stage was to start to prepare my panel - it’s often said that this is the 16th image in the set, something that was re-iterated consistently at the Advisory Day I attended. Probably more time was spent in getting this right than any other aspect - initially using Lightroom and then by printing small, 6” x 4” prints and shuffling them around – which really helped.
The Advisory Day
Finally, having
1. pulled together and printed an initial selection of 15 A4-sized images
2. decided on the panel layout,
3. mounted them on 50cm x 40cm off-white mounts
4. written my Statement of Intent, and
5. selected 5-10 additional images (for potential substitution)
it was then time to attend an Advisory Day. I had gone along, as an observer, to one a year or two prior to my starting this process which proved to be a worthwhile exercise. However now was the time to see, really, whether my prints and my panel were up to scrutiny by the RPS’s assessors.
I duly turned up with my 15 mounted prints and a selection of other, non-mounted images ready to hear where I was, what the considered view was on my submission and what needed to be done to get to the “A’ level.
There were quite a number of other panels being advised upon - some looked amazing – however there were some where even I could see that they weren’t going to be of a high enough standard.
My turn came and there were some very helpful comments from the two advisors, basically I was nearly there they recommended that I change a couple of the images, replacing them with two of my ‘reserve’ images.
So I went home, booked my Assessment Day – and, taking on board the comments and advice that I’d received, proceeded to work on my panel, re-printing some of the images and making sure that there were no blemishes to be seen and that the mounting was as good as it could be.
The Assessment Day
This took place in September 2018 – at the RPS Head Office, which was then in Bath. A nerve-racking day, especially when it came to the assessment of my panel.
The assessors sat and considered my panel for a couple of minutes before getting up and closely scrutinising each image – lots of whispering going on between them as the prints were passed around – was this good or bad?

My Initial Hanging Plan
In the end, they sat down and the spokesperson announced I was unsuccessful but that it was a near miss as there were a couple of images (04 and 07) that let the panel down, not really fitting in or providing the ‘sense of place’ required for a Travel panel. Ironically, one of these came from the pair of the reserve images from my Advisory Day set!
I was therefore offered a Referral meaning that I could re-submit the panel, replacing just the images in question, with the rest of the panel being considered a ‘Pass’.
The Second Assessment Day
Six months later, in March 2019, this time in Bristol, I presented my revised panel incorporating the two new images, one of which I had gone out and taken, knowing the type of image I was looking for and how it would fit within the panel.

My Revised Hanging Plan
This time, as it was a Referral, the Assessors just looked at the two new images, and how they fitted within the panel and, after a short deliberation, the Panel Chair announced my name and declared I would be recommended for an Associate distinction. Great relief!
The Conclusion
A few days later, I duly received an email confirming that I had, indeed, been awarded my Associateship, shortly followed by my Certificate and the Associate pin-badge.
Gratifyingly, the RPS Journal also featured my submission / panel in the August 2019 issue.
Do I go on to the Fellowship stage and the highly prized ‘FRPS’? I don’t know – I would need to think about this, and find a suitable location or subject before taking this any further.
Key Points:
You don’t need to travel far to create a ‘travel’ panel
A short, sharp and to-the-point Statement of Intent really helps - as much for your benefit, to keep your panel focused, as it is for the assessors.
Attend the Advisory Days - perhaps initially as an observer but definitely with your draft panel, mine really helped. Take along a diverse selection of other images that can be used to replace any which the assessors feel are not quite up to the standard that’s required.
There’s a huge amount of help and support out there – so make good use of it all
I really enjoyed, and benefitted from, the whole process – putting a cohesive panel of images together requires a lot more thought and consideration than accumulating a series of related images. In the end I had achieved my long-standing ambition of gaining the RPS’s Associateship distinction – all very satisfying!